An important survival skill to have as a pedantic collector (and casual customizer) of Rainbow High dolls is knowledge on how to fix uneven or messed up doll lashes.
I remember having very little issues with messed up lashes while changing out eyes with hot water for the first few batches of series one dolls. But with time, I notice the newer releases have more fragile and much thinner lashes that get messed up by hot water very easily. Dolls can also come new with uneven lashes.
Uneven lashes really bother me, and I’ve actually had to sell off a handful of dolls for this reason. Sometimes if I love the doll too much, I’d resort to changing out existing eyes for ones with better lashes. This comes with its own plethora of problems – ruining the other eye’s lashes (you don’t need to get hot water directly onto them to cause this, even just steam/dry heat can “straighten” out the lashes), accidentally stripping glitter makeup due to direct contact with the boiling water needed to soften the eye socket etc.
I’ve also tried taping offending lashes down directly onto the face, then pouring boiling water over, but this method causes the lashes to lose their curvature and stick up flat on the face unnaturally like this:


Applying and removing tape directly also runs the risk of removing any glitter makeup, such as those used in the Winter Break dolls.
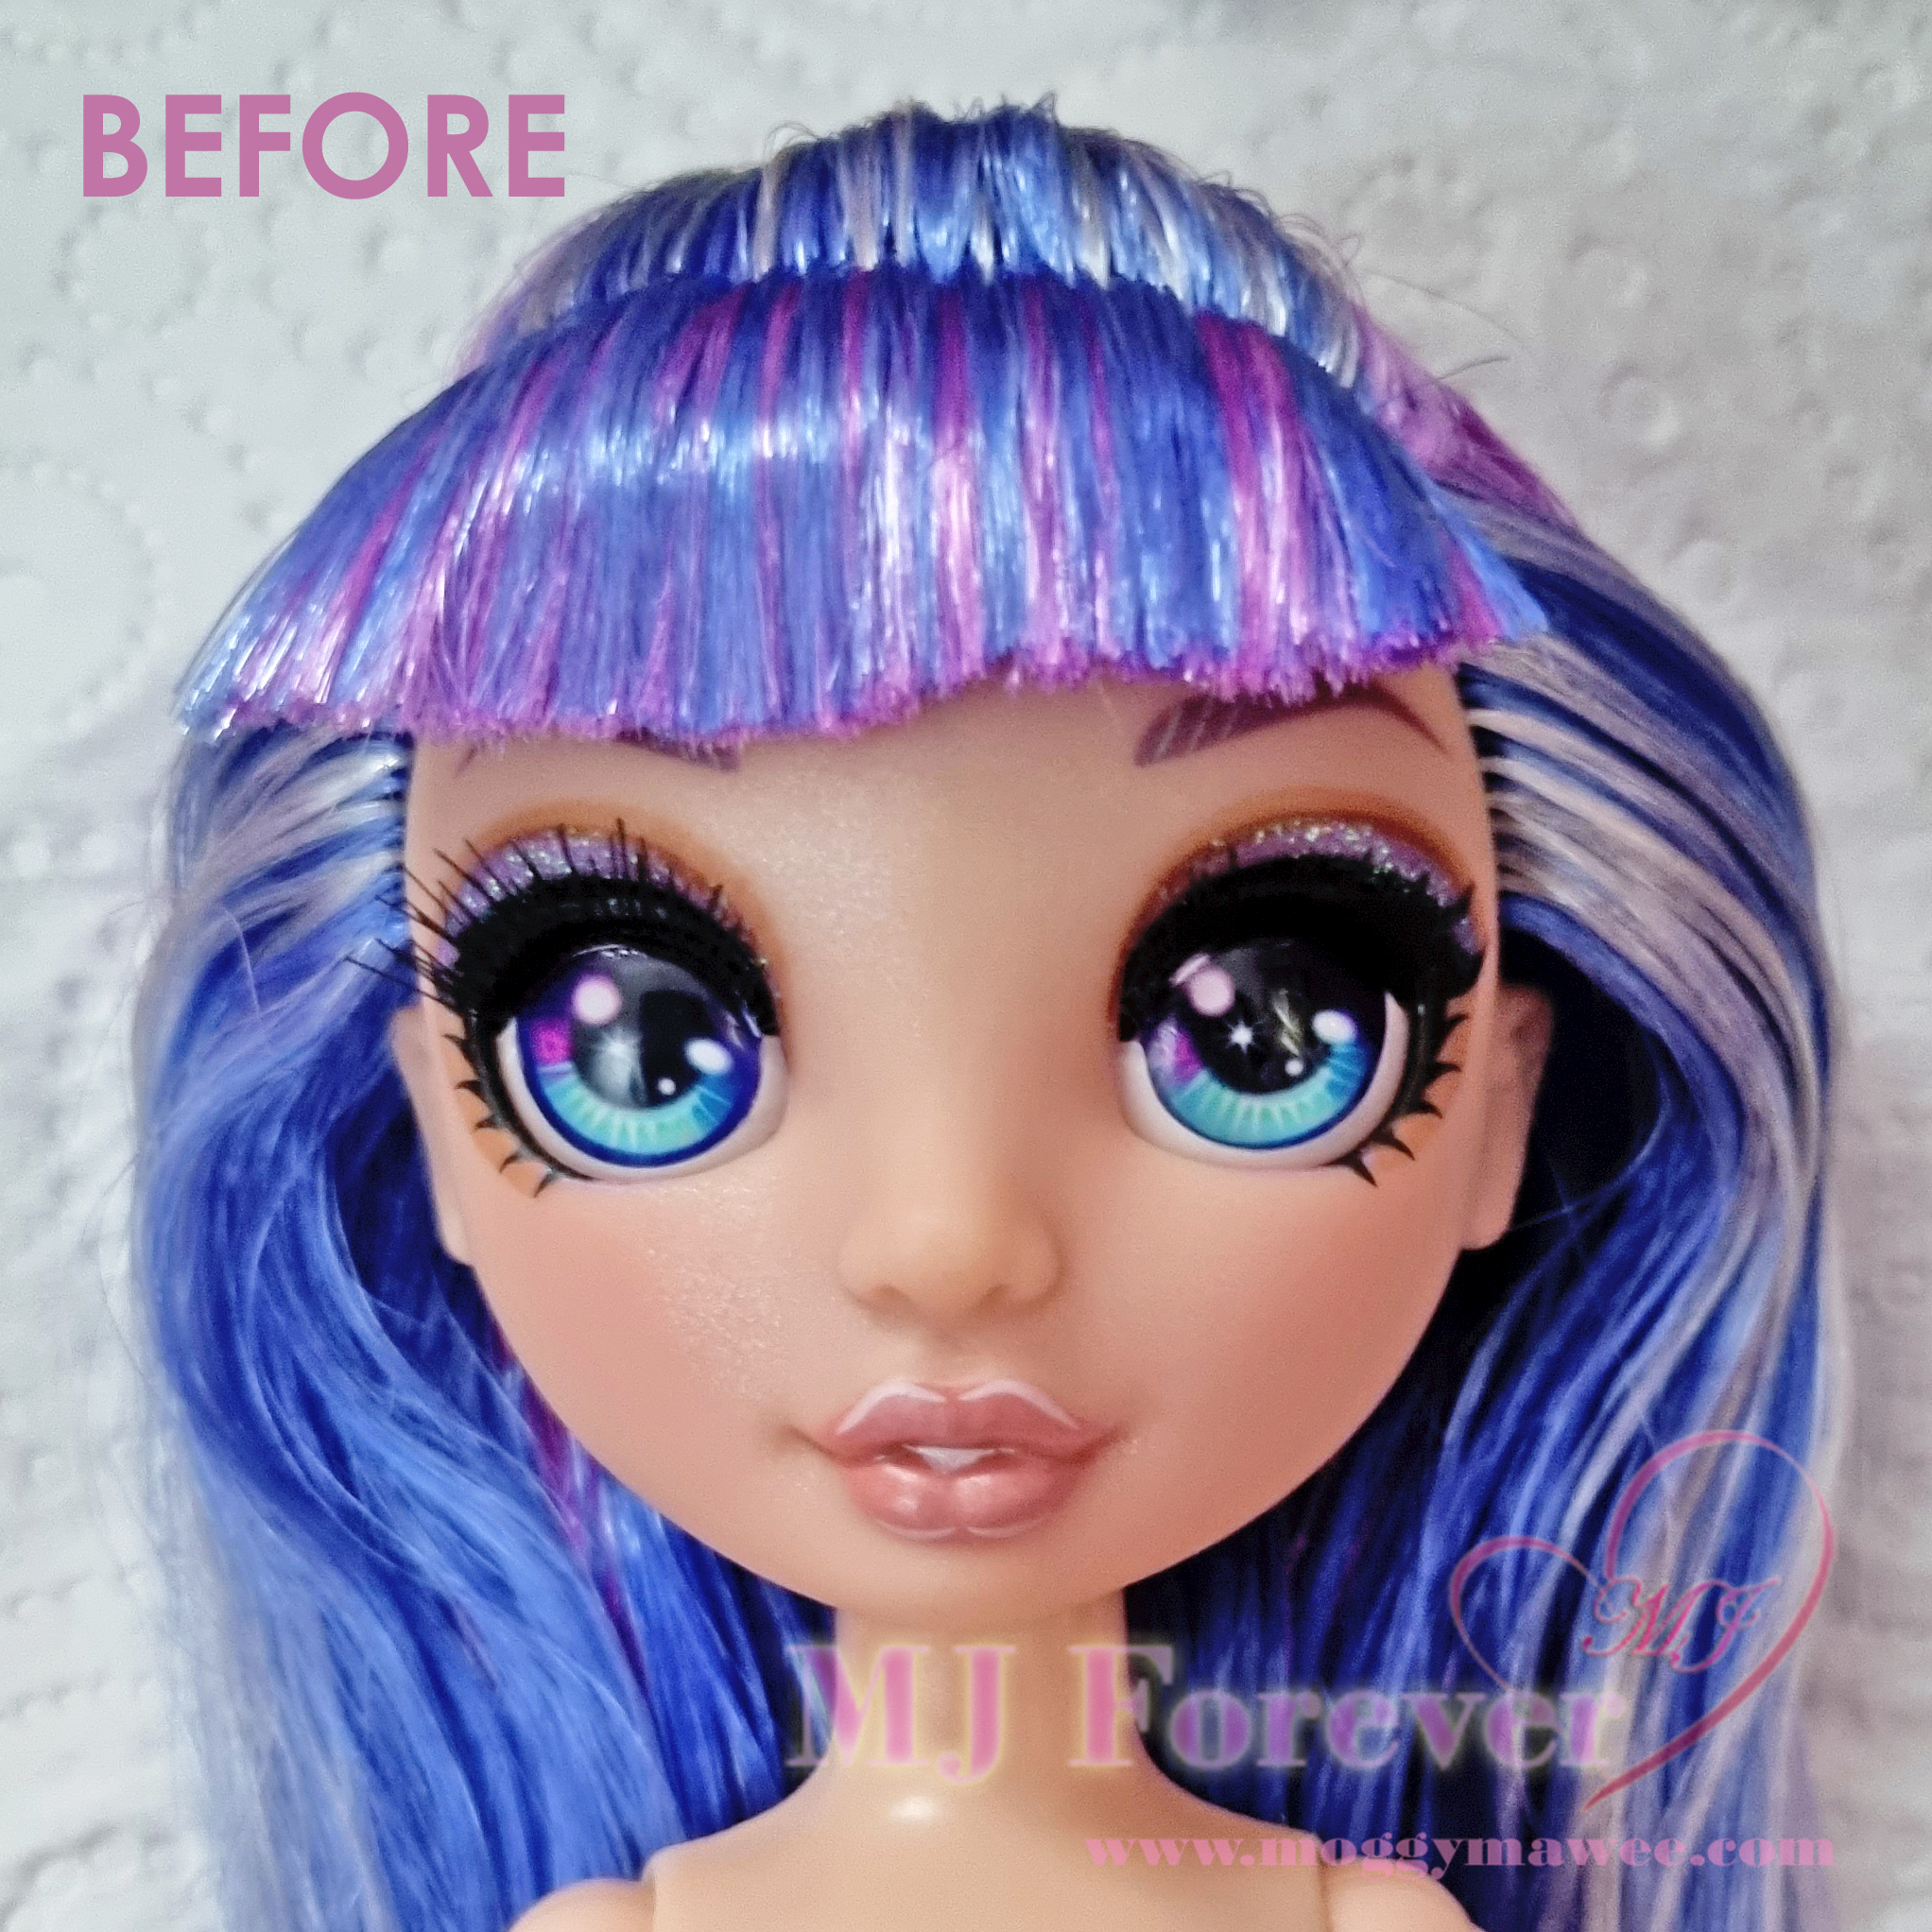
Now I’m excited to share with you all a simple technique that’s been working a treat to fix my dolls’ lashes (with the added bonus of not messing up fringes in the process). I will be using the series one Violet below as an example. As you can see, the lashes on the left eye is fanned out and up beautifully, while the ones on the right stick straight out horizontally and are barely visible above her eyeliner (sorry for the poor picture quality… I did not anticipate on making a guide on this).
The “technique” seems simple but it honestly took me quite a few failed attempts to get here. Basically, all I did was wrap several layers of cling wrap around her head just beneath her problem lashes. This allows the lashes to be taped directly onto the cling wrap, eliminating any risk of damaging any glitter makeup etc. It also adds thickness so the lashes can retain their curvature without being pressed up flat against the face. The amount of curvature is customizable depending on how many layers of cling wrap you wrap. Some collectors have mentioned using a spoon to recreate the lash curvature, but it sounds fiddly and I’d be too worried about scratching her face with the spoon to try.
When you tape the lashes down, make sure you are happy with how they look before applying boiling water. I find it easiest to tape down lashes with the doll placed upside down. I slowly sweep my tape downwards and outwards to “fan out” the lashes towards the outer corner of her eye, like this:

It often takes me several tries to get everything right, so make sure you are careful not to pull too hard on the lashes when you remove the tape to reposition. I would suggest using a light duty clear tape to make this easier.
It’s of utmost importance that the taped lashes do not shift at all during the boiling water process, so make sure the cling wrap around the head is secure – apply extra tape to secure it over the face if need be.
Once you are happy with how everything looks, apply the boiling water carefully to “set” the lashes. This is where the magic happens. Angle your doll downwards and pour boiling water down her taped eyelashes. I like to do this with my trusty borosilicate glass pitcher so I can pour small controlled streams of boiling water via the spout. You only get to pour over the taped lashes once or twice at most. Any more than that you run the risk of loosening the tape and clingwrap. Repeat the process by retaping and resecuring the lashes if you need more tries.
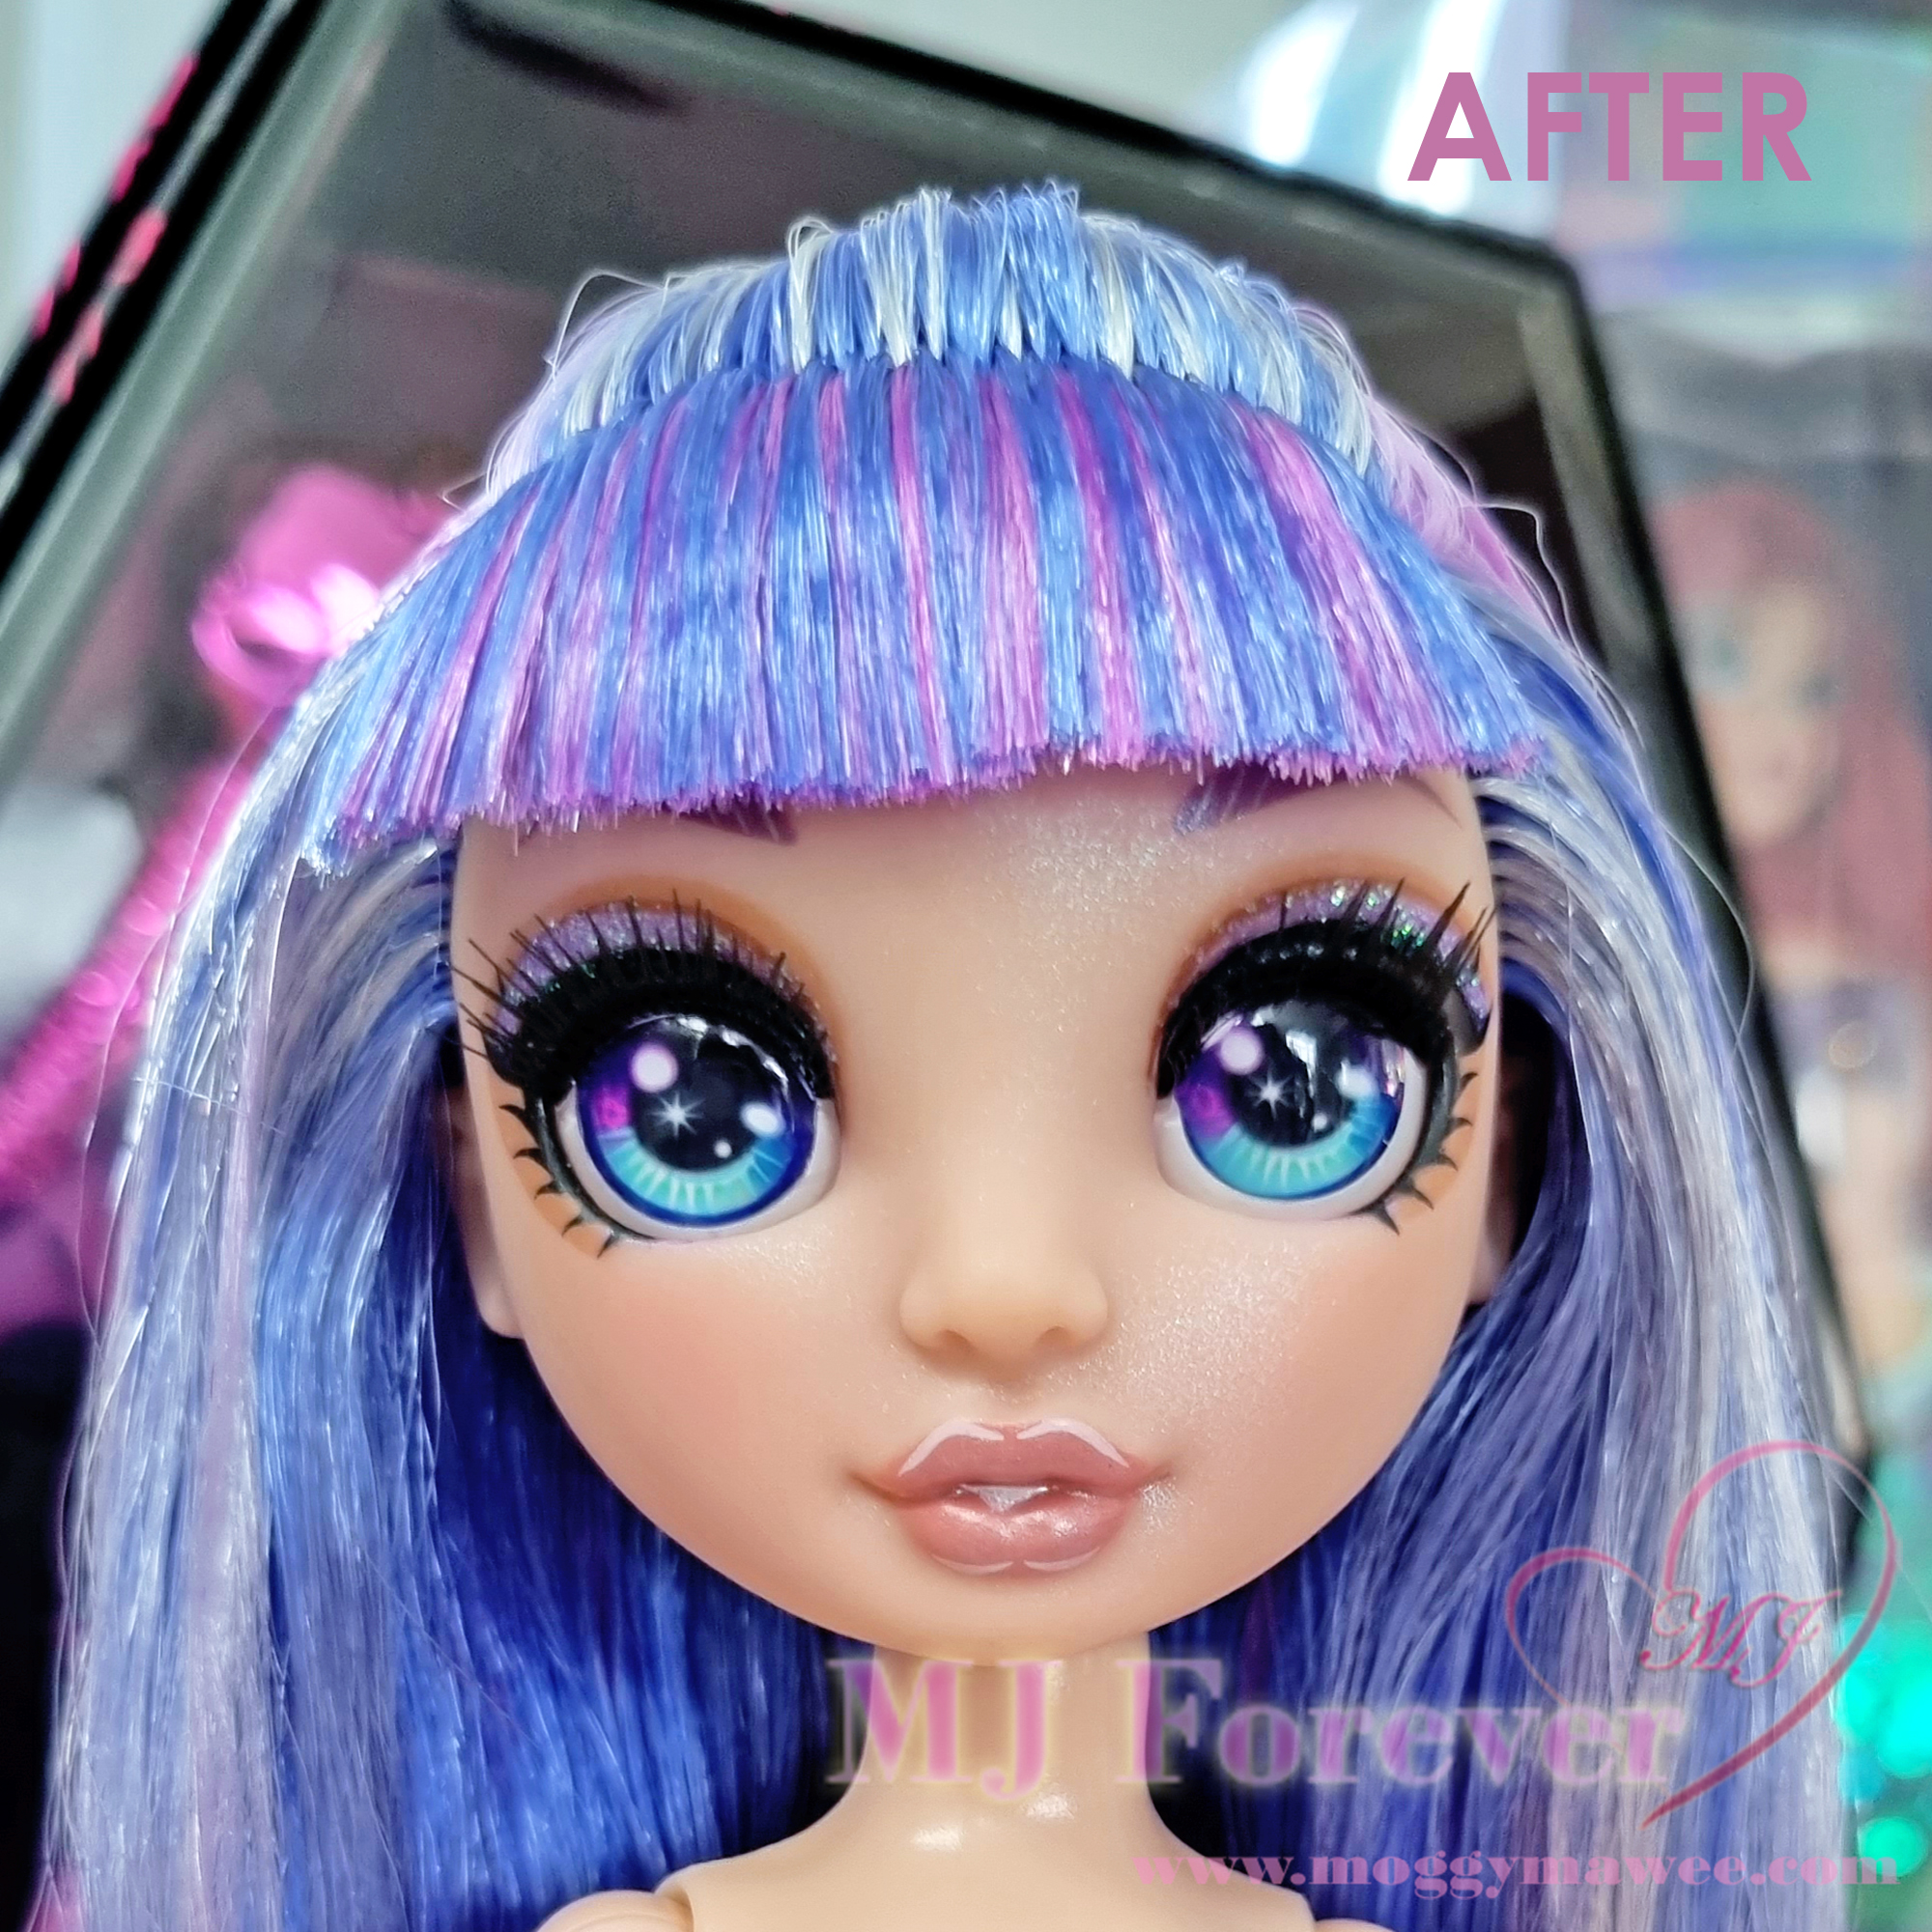
Once this is done remove the tape from her lashes carefully. This should come off fairly easily due to the boiling water. And voila! Eyelashes fixed! Initially they will look a bit clumpy because they’re still wet. I usually just leave them to air-dry then fan them out again with a small makeup brush.


Now if your doll’s lashes are super messed up, you might need to repeat this process several times, each time using several small pieces of tape to target different individual problem lashes.
Hope this eyelash fixing guide is somewhat helpful! I’m just relieved that messed up lashes will no longer be a bane of my doll customising/collecting life!
Categories: All posts, Dolls, Guides, Rainbow High Dolls